Introduction
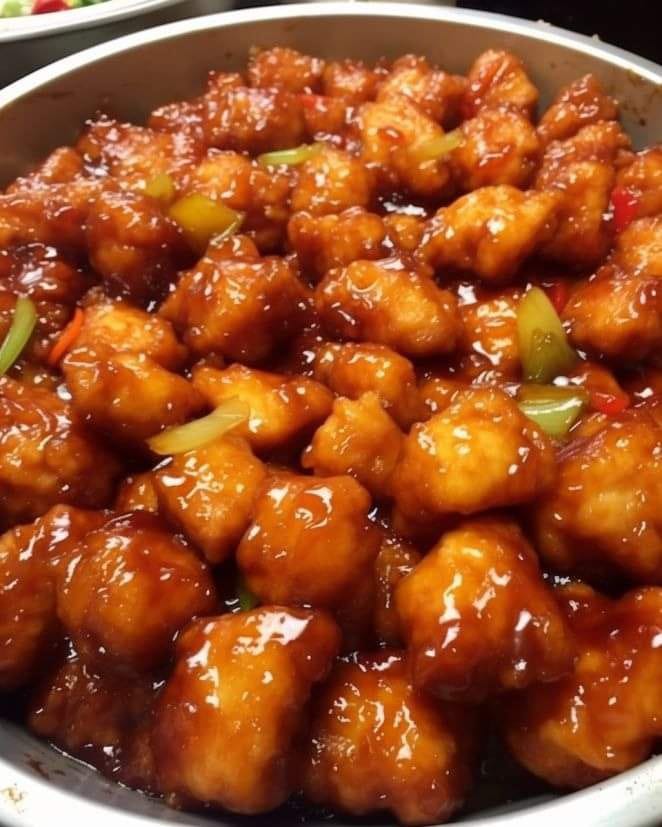
In this tantalizing culinary journey, we’ll explore the world of Baked Sweet and Sour Chicken. This delightful dish combines the sweetness of fruit with the tanginess of vinegar, resulting in a symphony of flavors that will leave your taste buds dancing. Whether you’re a seasoned cook or a novice in the kitchen, this recipe is sure to be a hit. Join us as we uncover the secrets to creating this mouthwatering masterpiece.
Table of Contents
- Ingredients
- Gather the Essentials
- Chicken, the Star of the Show
- Sweet and Sour Sauce Magic
- Preparing the Chicken
- The Perfect Cut
- Marinating for Maximum Flavor
- Coating for Crispy Perfection
- Baking to Perfection
- Choosing the Right Pan
- Timing is Key
- Achieving the Golden Crust
- Making the Sweet and Sour Sauce
- Balancing Sweetness and Sourness
- The Essential Ingredients
- The Secret Ingredient: Pineapple
- Assembling the Dish
- Bringing It All Together
- A Sprinkle of Freshness: Scallions
- The Final Bake
- Serving and Enjoying
- Plating Presentation
- Pairing Recommendations
- Savoring the Flavors
- Conclusion
- A Feast for the Senses
Ingredients
Gather the Essentials
Before we dive into the culinary adventure, let’s ensure we have all the necessary ingredients at our disposal. For this Baked Sweet and Sour Chicken recipe, you’ll need the following:
- 2 pounds of boneless, skinless chicken thighs or breasts
- 1 cup of cornstarch
- 3 large eggs
- Salt and pepper to taste
- Cooking oil for frying
Chicken, the Star of the Show
The quality of your chicken can make or break this dish. Opt for fresh, high-quality chicken thighs or breasts. Ensure they are boneless and skinless for a tender and juicy result.
Sweet and Sour Sauce Magic
Creating the perfect sweet and sour sauce is the heart of this dish. You’ll need:
- 1 cup of granulated sugar
- 1/2 cup of ketchup
- 1/2 cup of white vinegar
- 1/4 cup of soy sauce
- 1 teaspoon of garlic powder
- 1/2 cup of pineapple juice (from canned pineapple chunks)
Preparing the Chicken
The Perfect Cut
Start by cutting your chicken into bite-sized pieces. This ensures even cooking and makes the dish easier to eat.
Marinating for Maximum Flavor
In a bowl, mix the chicken pieces with salt, pepper, and a dash of soy sauce. Allow it to marinate for at least 15 minutes to infuse the flavors.
Coating for Crispy Perfection
In separate bowls, place cornstarch and beaten eggs. Dip each chicken piece first in the cornstarch, then the egg, and back into the cornstarch for a double coating. This will give your chicken that delightful crispiness.
Baking to Perfection
Choosing the Right Pan
Select a baking dish and grease it lightly. Arrange the coated chicken pieces in a single layer. Make sure there’s some space between each piece for proper crisping.
Timing is Key
Bake the chicken in a preheated oven at 425°F (220°C) for 20-25 minutes or until they turn golden brown and crispy. Be sure to flip them halfway through for even cooking.
Achieving the Golden Crust
The secret to achieving that perfect crust lies in patience. Don’t rush the baking process; let the chicken become beautifully golden and crispy.
Making the Sweet and Sour Sauce
Balancing Sweetness and Sourness
The sweet and sour sauce is the soul of this dish. In a saucepan, combine sugar, ketchup, vinegar, soy sauce, garlic powder, and pineapple juice. Adjust the sweetness and tanginess to your liking.
The Essential Ingredients
Stir the mixture over medium heat until it thickens, usually within 5-7 minutes. Once it reaches the desired consistency, remove it from the heat.
The Secret Ingredient: Pineapple
Add a handful of pineapple chunks to the sauce for an extra burst of flavor. Pineapple not only enhances the sweetness but also adds a tropical twist.
Assembling the Dish
Bringing It All Together
Once your chicken is perfectly baked and the sauce is ready, it’s time to marry these two elements. Pour the sweet and sour sauce over the crispy chicken pieces.
A Sprinkle of Freshness: Scallions
Garnish your dish with chopped scallions for a pop of color and freshness.
The Final Bake
Return the dish to the oven for another 10 minutes, allowing the sauce to infuse into the chicken.
Serving and Enjoying
Plating Presentation
Present your Baked Sweet and Sour Chicken on a plate with steamed rice or noodles. The vibrant colors and tantalizing aroma will make mouths water.
Pairing Recommendations
Pair this dish with a crisp cucumber salad or some sautéed vegetables for a balanced meal.
Savoring the Flavors
With the perfect blend of sweet and sour, tender chicken, and crispy coating, each bite of this dish is a flavor explosion that will leave you craving for more.
Conclusion
Baked Sweet and Sour Chicken is a culinary masterpiece that perfectly balances sweet and sour flavors. From the crispy perfection of the chicken to the tantalizing sweetness of the sauce, this dish is a true delight for the senses. Whether you’re cooking for family or friends, this recipe is sure to impress.
Now that you’ve unlocked the secrets to creating this delectable dish, it’s time to head to the kitchen and get cooking!
FAQs (Frequently Asked Questions)
- Can I use chicken breasts instead of thighs for this recipe?
- Yes, you can use chicken breasts if you prefer white meat. Just ensure they are boneless and skinless for the best results.
- Can I make the sweet and sour sauce less sweet?
- Absolutely! Adjust the amount of sugar to your taste. Start with less sugar and add more if needed.
- What can I substitute for pineapple juice in the sauce?
- If you don’t have pineapple juice, you can use orange juice or apple juice as a substitute.
- Is it possible to make this dish vegetarian?
- Yes, you can use tofu or cauliflower florets instead of chicken for a vegetarian version of this dish.
- Can I prepare the chicken in advance and bake it later?
- While it’s best to bake the chicken immediately after coating, you can refrigerate it for a few hours before baking for convenience.
Leave a Comment