Crafting delicious treats doesn’t always require hours in the kitchen or even turning on the oven. For those who love the idea of homemade snacks but might be short on time or simply seeking a cooler option during warmer months, no-bake recipes like these Homemade Crunch Bars offer the perfect solution. This particular recipe combines the timeless appeal of crispy rice cereal with the rich, indulgent flavors of chocolate and peanut butter, creating a snack that’s both satisfying and surprisingly simple to make. Sweetened naturally with maple syrup and bound together with coconut oil, these bars offer a healthier alternative to many store-bought snacks without sacrificing taste.
The beauty of no-bake recipes lies in their simplicity and the joy of creating something delightful from just a handful of ingredients. This Crunch Bar recipe epitomizes the ease and accessibility of no-bake treats, requiring only a mixing bowl, a few basic ingredients, and a refrigerator. Whether you’re a seasoned cook looking for a quick dessert option or a beginner wanting to dip your toes into homemade treats, this recipe promises a hassle-free experience with delicious results. It’s also a fantastic way to involve kids in the kitchen, teaching them simple cooking skills and the pleasure of making their own snacks.
Moreover, this recipe is wonderfully adaptable, catering to various dietary preferences and restrictions. Whether you’re vegan, gluten-free, or nut-free, a few simple substitutions can tailor these Crunch Bars to fit your needs. The option to swap peanut butter for any nut or seed butter and the use of coconut oil as a vegan-friendly binder means that almost anyone can enjoy these scrumptious bars. Perfect for an afternoon pick-me-up, a casual dessert, or a sweet treat in a lunchbox, these No Bake Homemade Crunch Bars are sure to become a cherished recipe in any household.
Ingredients:
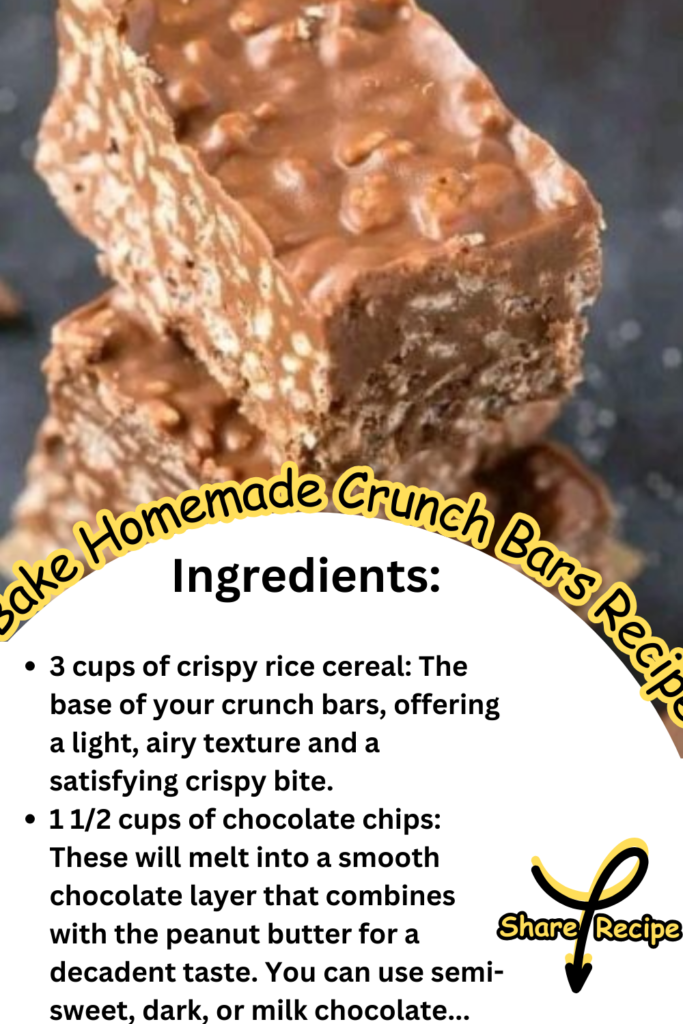
- 3 cups of crispy rice cereal: The base of your crunch bars, offering a light, airy texture and a satisfying crispy bite.
- 1 1/2 cups of chocolate chips: These will melt into a smooth chocolate layer that combines with the peanut butter for a decadent taste. You can use semi-sweet, dark, or milk chocolate chips, depending on your preference.
- 1 cup of peanut butter: Acts as a binding agent and adds a creamy, nutty flavor that pairs wonderfully with chocolate. You can substitute it with any nut butter (like almond or cashew) or seed butter (such as sunflower) if you have allergies or prefer a different taste.
- 1/2 cup of maple syrup: A natural sweetener that brings a subtle, caramel-like sweetness to the bars without the need for refined sugars.
- 1/4 cup of coconut oil (or grass-fed butter): This helps to solidify the bars when chilled, giving them a firm texture that melts in your mouth. Coconut oil adds a slight coconut flavor, while grass-fed butter lends a richer taste.
Instructions:
- Preparation:
- Begin by lining an 8 x 8-inch baking dish (or a deep baking tray of your choice) with parchment paper. This step ensures that your bars will be easy to remove and cut once they are set.
- Mixing the Cereal:
- Place 3 cups of crispy rice cereal into a large mixing bowl. The bowl should be big enough to allow for easy mixing without spilling the ingredients over the sides.
- Melting the Chocolate Mixture:
- In a microwave-safe bowl (or in a saucepan if you prefer to use the stovetop), combine the chocolate chips, peanut butter, maple syrup, and coconut oil (or grass-fed butter).
- Heat the mixture until the chocolate and coconut oil have completely melted. This usually takes a few minutes. If using a microwave, it’s a good idea to stop and stir the mixture every 30 seconds to prevent burning and ensure even melting.
- Once melted, remove from the microwave (or stove) and whisk the mixture until everything is thoroughly combined into a smooth, homogeneous mixture.
- Combining the Ingredients:
- Pour the melted chocolate/peanut butter mixture over the crispy rice cereal in the large mixing bowl.
- Gently mix until all the cereal is evenly coated with the chocolate mixture. Ensure that there are no dry spots and that the mixture is not too heavy on one side of the bowl.
- Setting the Bars:
- Transfer the mixed ingredients into the lined baking dish, spreading it out evenly with a spatula or the back of a spoon.
- Refrigerate the dish for at least an hour, or until the mixture becomes firm. The chilling process solidifies the coconut oil or butter, which helps the bars hold their shape.
- Cutting and Serving:
- Once set, remove the dish from the refrigerator. Lift the parchment paper to easily remove the set mixture from the dish.
- Place on a cutting board and cut into bars or squares of your desired size.
- Enjoy as a delicious snack or dessert!
These No Bake Homemade Crunch Bars are not only easy to make but also customizable to cater to different dietary preferences and allergies. They’re perfect for a quick treat, a snack for the kids, or even as a homemade gift for friends and family.
Leave a Comment